DEFINITION:
Adobe® Photoshop® Elements provides a complete workflow solution for working with digital photos, by integrating a wide range of digital editing, sharing, and searching capabilities. From this one application, you can import all of your photos; tag and organize them; edit and enhance them; create cards, photo albums, and other fun projects with them; and then output them to print, CD, DVD, TV, or the web.
ACQUIRE AND ORGANIZE YOUR PHOTOS:
From within the Organizer workspace, you can import photos into a catalog, tag them, group them in collections, sort them, and search for them— among other things. To make searching for your photos easy, you need to create and attach tags to each photo. You create tags based on specific information, such as people's names, events, or places, and then you attach the tags to the photos they pertain to. It's the same idea as writing on the back of a printed photo, only much more efficient!
This tutorial shows you how to use tags and collections to retrieve photos from hundreds or even thousands of photos in your Photo Browser almost instantaneously—all while keeping them in their original location on your hard drive.
EDIT YOUR PHOTOS:
Photoshop Elements has a multitude of editing tools to make your images look fantastic. Start in the Quick Fix workspace for a wide range of basic photo-editing capabilities (such as Auto Smart Fix and automatic red-eye removal). When you’re ready, move over to the Standard Edit workspace for more freedom to edit and create the image you want. In this tutorial, you’ll do some editing in Quick Fix, and then move to Standard Edit and add some effects.
CREATE A SLIDE SHOW:
The Creations wizard is a fun and easy way to make cards, calendars, slide shows, and more. In this tutorial, you’ll create a custom slide show using the collection you created earlier, and then add a narration to finish it up.
ADOBE PHOTOSHOP NOTES
Creating a Canvas
To create a new Canvas Click Ctrl+N, Click OK
• To select the area of the canvas, Click on the “Rectangular marquee tool (M)” or M [See other tools under the Marquee tool]
• To ensure that all tools are set to defaultà
Click on the square picture before the marquee tool à Click Reset All à Click OK
• To ensure that all colors are set to default à
• Click the Black square background and foreground color (D). This reset all colors to default
Click the Elliptical Marquee and Drag to draw an Oval on the Canvas. Now Fill in the Oval area à Click the Bucket tool and click on the Oval area
• Now select the Rectangular marquee tool and make four rectangular spaces on the black Oval Pressing the Delete key to cut the Selected black rectangle. (Pumpkin design)
CREATING THE FOOTHILL PARK
Activate the FoothillCenterPark.psd and save it in your flash drive as “FoothillCenterPark” with your initial (We can now work on this file without overwriting on the original file)
• Building Removalà Click on the Magic Wand Tool. Select areas of consistent color
• Click on the first and second building till both buildings are surrounded by the wands [Reset the settings of the Wand tool by selecting the “Add to Selection tool”. Cover buildings with wands all around.
• Click Ctrl+Z (to deselect any wand tool operations)
• Press Delete key on the keyboard [The building is now cut off with white space on background].
• To fill the White space with the sky color, Click the “Eye Dropper” tool (it allows us to select any color on the screen)
• Now choose the Bucket tool and click on the white space to fill it with the sky color
• Click Ctrl+D (to deselect the area) Zoom in for better view.
• Use the Spot Healing Bruch to mend the color. Continue until all the area is filled
• Save Project as “NoHighBuildingsCityPark” on your Removable Flash Drive
• Use the Crop tool to remove the tree truck from the right side of the picture
• From the top of the picture drag to cover all the picture without the tree trunk.
• Save Project as “NoTreeTrunkPark” on your Removable Flash Drive
ADOBE LAYER PALETTE
• Layers allows us to separate image data, so that we can move and separate image independently
• Click Window on the menu bar, select Layers, select Histogram. Place the Histogram pallete over the Layers (See how they tile with tabs)
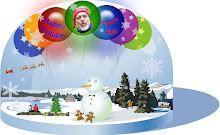
• Load the Balloon Image from the Image folder on your system: File à Open à Balloon.psd
• Press Ctrl+A on the Keyboard to select all this image and Press Ctrl+C to copy the image
• Click the NoTreeTrunkPark to activate it again.
• Create a new layer to hold the Balloon : Click Layer à New à Layer
• Name the New layer: Balloon and Click OK.
BALLOON LAYER
• Click Ctrl+V to paste the Balloon on the Foothill Center Park Project.
• Pull down the Image menu à Reside àFree Scale
• Click the Maintain aspect ratio at the top to lock the width and height together so that they will remain proportionate. Double the Width and change it to 20%.
• The Balloon as a separate layer can be move independently of the background layer.
• Balloon is on the wrong side, to adjust it: Click à Image à Rotate à Flip Layer Horizontally
• TEXT LAYER
• Click the [Horizontal type tool [T]]. Click in the sky area [see the new layer on the palette (T). Change background color
• Change Fonts and Font size. Back to the sky area type:”Balloon Watching”
• Save the file as: BalloonWatchingFoothillPark
• Click the Balloon Watching layer to ensure that it’s the current layer
• Click Ctrl+Shift+N (to open a new layer) Click on Layer 1 to rename it Circle, Press Enter
• Click Shift M for Marquee tool Click the Elliptical Marquee tool. Enclose the text in Elliptical shape
• Fill the text oval with color – By opening the Color picker, Select white, fill with Bucket tool
• Ctrl+D to Deselect. Reposition the Test Layer. Adjust the visibility by press the eye on the layer
LAYER TRANSPARENCY
• Click on the Opacity arrowà Slide the Opacity slider to 13% (see the effect close to the sky)
• Before the opacity option is the Mode option; Click to open it. Select Dissolve
MANAGING MULTIPLE LAYERS
• Click Layer menu àDuplicate (see the duplicate layer box appear, select New on Document and name the layer Test
• Practice Deleting Layers by using the Delete Icon
• Open to insert the file Glacier from the Image file and select the People only layer
• Ctrl+A to select the image and Ctrl+C to copy the image. Press Ctrl+V to paste this image
MERGING LAYERS
• Click Layers à Flatten Image
• Press Ctrl+Z to undo the flatten command
• Save the Project in jpeg format à File àSave asà On Jpeg option, click OK
Do I Qualify?


![Best of the Class [Morning]](https://blogger.googleusercontent.com/img/b/R29vZ2xl/AVvXsEgAYEGeDUOEWt1aCLZ8c5PUQgtYV0BlUSF4zRfMZvA0A0ZFXcXG-0BkT78RlZ-IeYDO-vjVfjqVuelW6rWqoVQfk9m1_OpH7ZGb1e-9yFSYXzGc3KnerYHCOvBWnWoeftFzdBkq9p3qKIqV/s220/DSC_0020.JPG)
![Best of the Class [Evening]](https://blogger.googleusercontent.com/img/b/R29vZ2xl/AVvXsEiIma70AuO5zQqx7ZdhfP5fqIhxW80UiYvsyFnTbyGObZY7njwo5VPwac6g4xG8G3l73rN6aNthEnlx5tWZD1AX9hS5EPpbz5Km6VJeVhWrIbLSubH8XmpZB-deWy0PDdZfJddWzLRObSg3/s220/IMG_9274.JPG)
![First Runner's Up [Morning]](https://blogger.googleusercontent.com/img/b/R29vZ2xl/AVvXsEiZXwujmeTluGrDJSQ1QJi5-lnmuSzUPh0MC95ngebb18y9l21jeVu-Xk2JWEBJM1KGpw-UkMlkLA7Qcw61zzTWV_RIp6AA0MqbXAgbCvDV-mM5dpX6Vj9B6WuMaANGo0EDbFs4PuPmAUog/s220/DSC_0015.JPG)
![First Runner's Up [Evening]](https://blogger.googleusercontent.com/img/b/R29vZ2xl/AVvXsEh1kgRUEQ2k2p5FyY2bW2kNWDPEE1qNVs91B9KYJ0fWtKLqDDnmjs7ASOs81y5x6varzvvjlP-rwhZWSrvOXIyD4VVq2uYPaU7mWU4M5IANdNgVHXvbbpZugdHxmnUpKkCIO-uUbaNHqNsa/s220/IMG_9277.JPG)
![Second Runner's Up [Morning]](https://blogger.googleusercontent.com/img/b/R29vZ2xl/AVvXsEiyLQjNe5Bkew5uKilDugfAztyi6RQCoRRJjkXaLgFXLgsK0CgEgXSbbkbKaqVmw_s2HeHi5FRxsRmfPF3uZJTBOPw7J8SKEUV-s-VP05FsIb3ma1DhMMgu3yUf_3ZO1sFs7qSdcagIskRN/s220/DSC_0006.JPG)
![Second Runner's Up [Evening]](https://blogger.googleusercontent.com/img/b/R29vZ2xl/AVvXsEj1hyphenhyphenkauYZW7ray_wnEi0K4Re7wPgl1YorvT9TRjaAH88WtrmhWzFxnZFctNBEiVv8ya7RPHbcqpdlAXW1Jj_Ly4uzGuUQOxWGMEotAttwaCLb58ieRRiPtYI2pVl0fQ8LgegFBV4l9nw1B/s220/IMG_9272.JPG)